Pages

Friday, December 30, 2011

From Discount to Decor!

I have about 43 decorative pillows in my home. Well, maybe not THAT many! But lately, I haven't felt too fond of the ones I DO have. They need a refreshing - new shapes, new colours, new prints. I think little changes like this will be perfect for the New Year.

So today I began with the pillows on the master bedroom bed. I wanted something cozy ( and cheap!), so after perusing Pinterest, I hit the second hand store and bought these:A couple of woolly Irish Knit sweaters from the ladies department. I had come on the right day, too, because everything was an additional 50% off!
So I actually only paid half of this:
Not bad, eh? And because I was covering pillows I already had, this was my only cost!
Shopping done, ( I got some other really great second hand bargains - but I'll share those in another post!) now the pinning, cutting and stitching part of the project.
First I turned the sweater inside out and placed my pillow form inside. This allows me to find out exactly how much sweater to cut-off.
I then pinned the sweater snuggly around the pillow form. I made sure the cable designs were straight and balanced equally on the pillow shape. My pillow form fit perfectly into the sweater, right up to the turtleneck. I pinned across the lower-neckline of the sweater.
I am glad I had some sharp scissors for the next part. After removing the pillow form, I cut a 1/2 inch seam allowance around the pinned circumference.
Immediately my sweater began unravelling, so headed to the sewing machine and quickly zig-zag stitched around the whole edge. After, using the pins as a guide, I switched to a straight stitch and sewed around 3 of the 4 sides of the pillow cover. I left the bottom open so that I could slip my pillow form back into the cover. Then with matching thread, I hand-stitched the bottom of the pillow closed.
Ta-da!! Don't they look great? And I managed to sew 2 sweater pillows in less than an hour for a grand total of $6.00!!Ah the cozi-ness of it all - sweater pillows, the handmade cream-coloured quilt we received as a wedding -present from my aunt and the patchwork quilt I made for university dorm-room 16 years ago. Oooh -I could snuggle into that bed right now!
Our bedroom is slowly coming together - new wallpaper, new headboard, new pillows, and the new hot-water bottle and cover my hubby gave me for Christmas. Picture perfect!
Thanks for visiting! Please leave a comment - I love reading them all! And please- BECOME a FOLLOWER!

Monday, December 26, 2011

LEGO Cakes for My LEGO Boy

My oldest son just turned 7 years old. I can't believe it! It feels like only yesterday we surprised to find out we were pregnant after almost 3years of trying and several rounds of fertility drugs. Bryn is one of of our Miracles.
This year's birthday has been particularly joyful for us because shortly after Bryn's 6th birthday, we found out that he had developed a fist-sized brain tumour. To make a long story short, Bryn has had surgery and has recovered with flying colours. We are forever on "tumour watch" but are glad that everything has worked out so well.

So - when my sweet little Miracle Man asks for a LEGO- shaped birthday cake, I have to deliver! After googling this several times, I came across some easy instructions to create building-block cakes perfect for my LEGO-obsessed 7 year old.

By the way - I am by no means a cake-decorator. You'll find much better examples elsewhere on the web. : ) But you can tell my cakes were decorated with love!

1) Bake one 9x13 slab cake. Chocolate by my boy's request! I lined the pan with parchment paper so that I could easily remove the cake from the pan.
2) Cut the cake into "building-block" shapes - squares, rectangles and long strips.
3) To make the raised circles on each cake, cut a large marshmallow in half with sharp kitchen scissors.
4) Ice each cake in your choice of LEGO colour. Also, ice the marshmallow halves needed for each cake.
5) Apply the iced the marshmallows to the iced cake.
So what do you think? They aren't perfect (in fact, at the time, I was quite embarrassed by them. But now, looking at the pictures, they really aren't half bad!)
And my son- what did he think? He said they were "awesome" and couldn't wait to show all of his friends. So, after seeing "Puss in Boots" at the movie theatre, we returned home for slices of LEGO cake. And yes - they other kids thought they were cool too!
Thanks for visiting. Please leave a comment and BECOME a FOLLOWER!!

Elf on a Shelf Antics

Our Elf, Cricket, did some crazy things leading up to Christmas Day. He arrived right after Hallowe'en and almost everyday he did something silly to entertain our 3 kids. (Thank goodness for Pinterest for whenever he ran out of his own ideas for adventures!)

A Sugar Angel:
His favourite perch - on the wreath in the TV room:
Cuddling with the pumpkins, right after Hallowe'en:Making a ju-jube pattern:Helping himself to a little snack:
Another cozy wreath:On Christmas Eve Day he arrived with this jar of cookie ingredients. What a lovely final gift!
Time for some art!
On your mark, get set - GO!
MMmmmm...candy canes.....Marshamllow initials:
And my favourite one - giving a concert for the members fo the Nativity!!


Thanks for looking. Please leave a comment. I read each and every one!

And BECOME A FOLLOWER - I'd love that!

Thursday, December 22, 2011

Wednesday, December 21, 2011

Red, Green & Healthy Kids Mix

Want something as easy as shopping the pantry and a quick stop at the bulk food store? And the guarantee that the kids will LOVE it!??

Well then - start with a couple cups of 2 different breakfast cereals: (Cheerios and Corn Pops here - but anything kid-friendly will work!)
Pop 1 bag of microwave popcorn and dump it in (after you have sifted out the un-popped kernels - no kid likes those!)
From the bulk store - a handful of chocolate teddy bears, candy cane corn, and Santa Ju-Jubes.
How about throwing in some Christmas jelly balls, Smarties and holiday-shaped mini candy?
Festive candy corn, Santa-mallows and honey graham cracker bears.
Don't know what these are called. Hmm.. Chocolate with mini-sprinkles- yummy! And some (healthy!) dried cranberries
Oh yeah! Doesn't this look good! And really, there is more "good-for-you" stuff than candy, right?
C'mon - it's Christmas. Every kid (and mom!) deserves a treat these days. Enjoy!!
Please leave a comment - I love reading those. And BECOME A FOLLOWER. Only 2 more until I hit the big 5-0!

Sunday, December 18, 2011

Our Christmas Home - 2011

How about a little tour of our home, decorated for Christmas. I tried to make it colourful and whimsical, just right for the enjoyment of our little people who are 3, 5 and 7 years old.

Here is our tree. I made and bought (mostly second-hand!) all new ornaments this year. After 10 years of using the same old stuff on the tree, I was ready for a change. (That's our Elf on a Shelf, Cricket, right there in the middle. We find him in all of the craziest places!)

I added a fair bit of Christmas decor to the items that are up all year long. I hate having to store my favourite things during the holidays, so this year I just left it out and decorated around it!
There is our most recent family portrait. Family is the most important thing at Christmas, so I put it right in there amongst the pretty Christmas-sy things.
Just jazzing up our family room mirror here. We received this wrought-iron mirror as a wedding present 10 years ago and I still love it!
This is our "hands-on" Nativity set. My mother bought it for the kids a few years back. I am pleased that all three kids know the story of what is taking place within its walls. I find it quite adorable that they often re-enact the first Christmas with these little plastic people. Sometimes though, Baby Jesus becomes Barbie's newborn ( and daddy is Iron Man). It's fine with me. This nativity was made for children to handle and love.
My husband's grandfather build this hanging shelf unit many, many years ago. When Grandma had to sell her house after Grandpa passed away, I asked if we could have this piece of home-made handiwork for our home. Grandma was so pleased to see it go to a good home.

I made this paper wreath way back in October. I had almost forgotten about it until I scrolled through some older posts here on the blog. I glad I did. Now it hangs on the glass door of one of our kitchen cabinets for all to see!
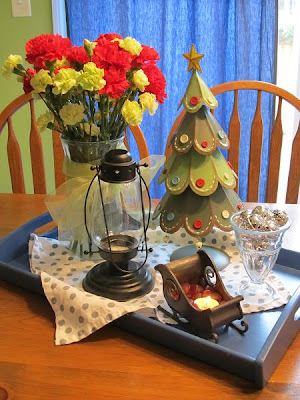
My mother gave us this clock when my then-fiance and I moved into our first apartment together. It hangs in our kitchen above this cabinet that holds all of my recipe books. There is nothing in these presents (much to my kids disappointment!). I thought some pretty wrapping paper was needed in this particular vignette. The arrangement in the middle of my kitchen table is always built on a wooden tray. That way, I can move the whole thing out of the way when meal time comes.
The pincecone wreath was a second hand store purchase. It was originally naturally coloured, but I wanted to update it a bit. Out came the white sparay paint - and voila! A snow-covered wreath!
I found these bottles at a discount store. I was drawn to their shape and their stoppers. The icey flake seemed to fit well with them, especially after I poured some mini-snowballs into the jars.
Oh pink poinsettias! How I love thee! I have these all over the house this year. My local grocery store is selling them for $4 each - of course I am going to take advantage!
Thanks for stopping by and visiting our little home. Please leave a comment- I LOVE reading them all. And please - BECOME A FOLLOWER. That just makes my day!